
Stone Lithography
Lithography is one of the hardest areas of printmaking to de-toxify, but great advances have been made at least in helping it to be less toxic. All of the processes explored and explained here have been tested and/or developed by master printmakers with very high standards. While not all results can mimic stone lithography exactly and maintaining the stone process itself without maintaining toxic materials is difficult. They have been deemed worthy of making high-quality, high-integrity prints in their own right. Waterless lithography is one of these processes. It is really not non-toxic, but it is an interesting process and is far less toxic than traditional litho.
Stone Lithography is rich in technical discoveries, starting with the very simple one that oil and water do not mix. Traditionally images are printed from cut stone. After the artist draw on the stone with his grease crayon, the lithographer would then treat the stone with chemicals and water. The image created by the artist, being greasy, would repel water, which would cling only to the surface not touched by the artist’s crayon. The lithographer would then roll up the stone with oily ink over the entire surface of the stone. Now the water would repel the ink, which would adhere only to the image created by the artist. Paper would be laid over the inked image, compressed by a heavy steel roller from a press, to lift the inked image from the stone.
Advantages of stone lithography
- Rich density of ink deposited on paper, the grain and surface also allow for more purchasing of the ink onto the paper.
- Creative latitude, towards reworking the image, in the drawing and printing stages. This is due again to the grain density and hardness of the stone.
- The stone allows for a more workable surface to work and roll ink upon, again the weight and thickness of stone is desirable in intensity of creative work.
- More individual specialized techniques can be used, such as line engraving, acid tinting, and biting and image reversals. These techniques can be rendered quickly and accurately.
Safer Lithography
Estisol use in Stone Lithography: Tradition meets Contemporary Process
Estisol offers the users a health friendly alternative to traditional petroleum based solvents. The use of Estisol is more environmentally friendly, can be used for multiple purposes and will drastically improve the air quality in any studio.
After been demonstrated the effectiveness of this product at many conferences, the use of Estisol has steadily made its way into many studios throughout Canada, and in very recent years into American studios. This new cleaner and medium is central to the reinvigoration of the medium of printmaking.
- Estisol as a relatively new solvent originally developed for cleaning parts in car manufacturing plants in Europe because of the health hazards of VOC.
- It has zero volatile organic compounds (VOC’s), and does not carry any other air born toxins
- Estisol is chemically stable, and non-combustible
- Estisol is more economical in the long term, but only when used correctly
Remember, Estisol is only a more cost-effective solution if used properly and sparingly.
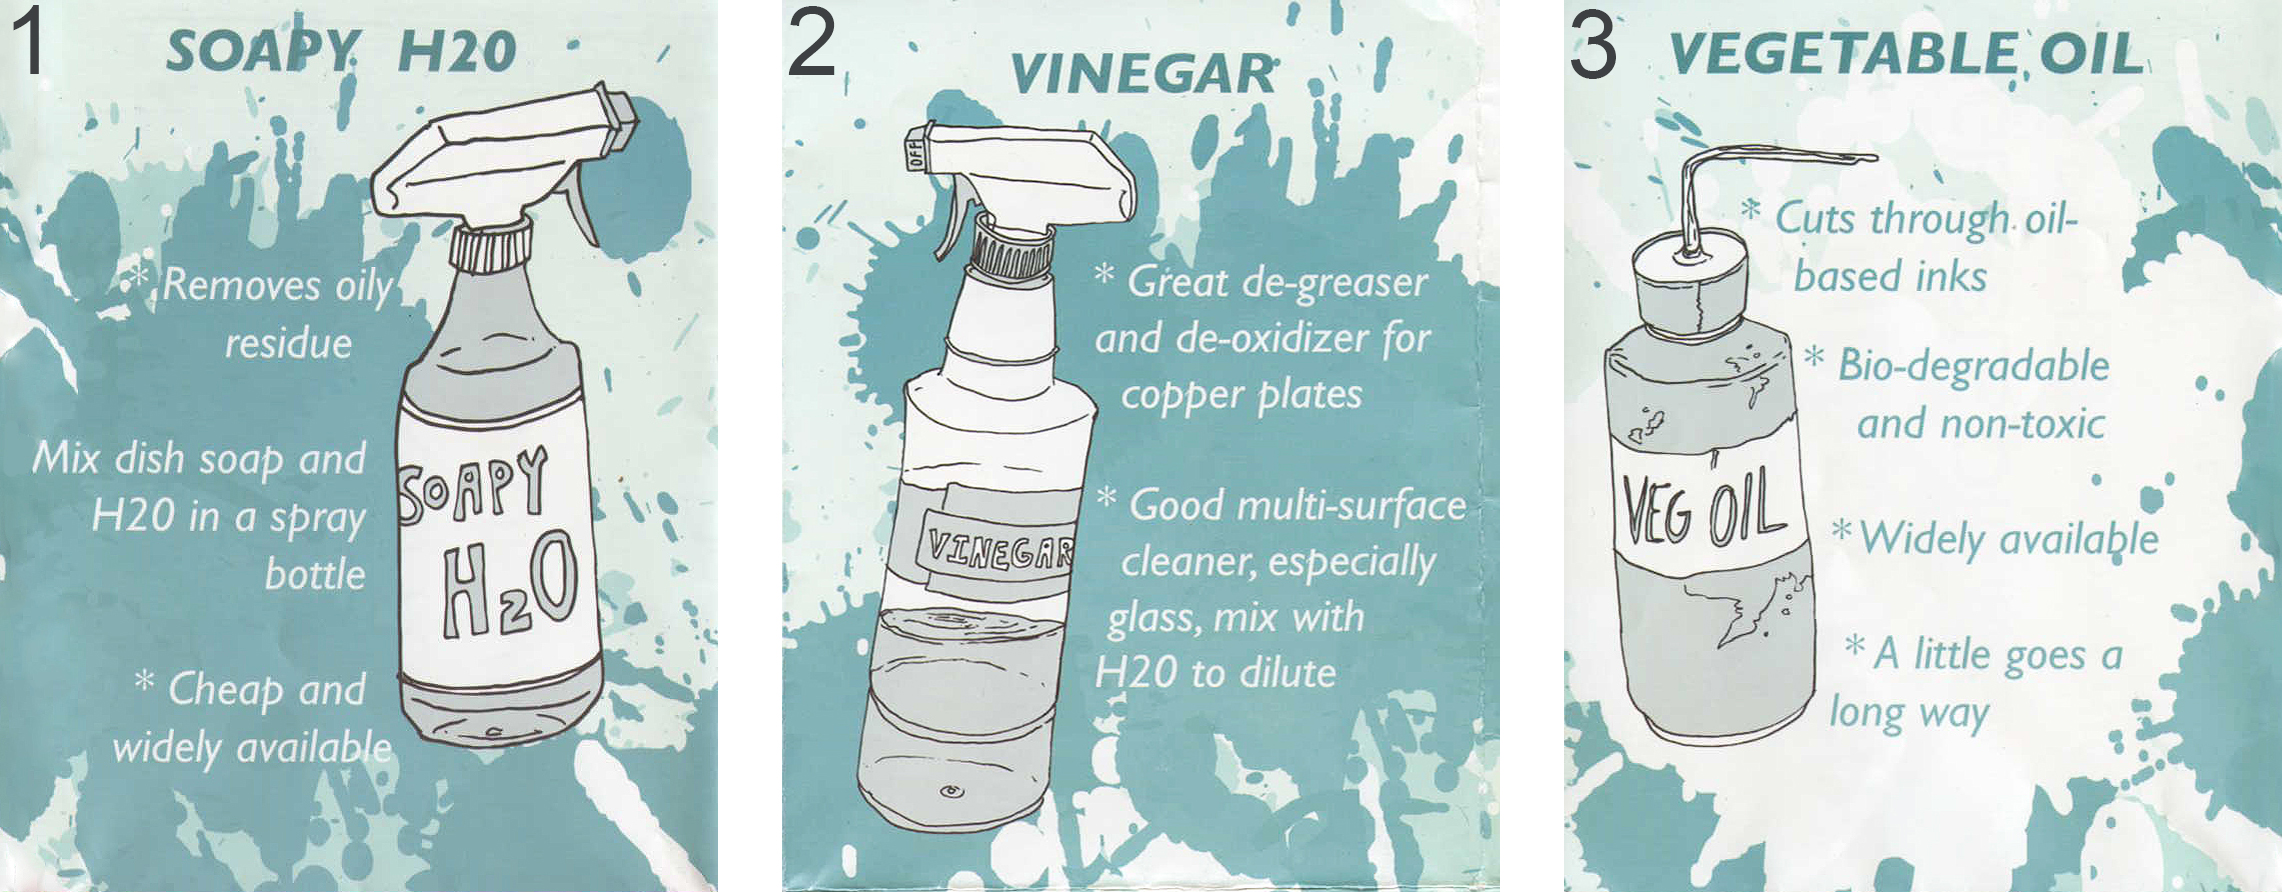
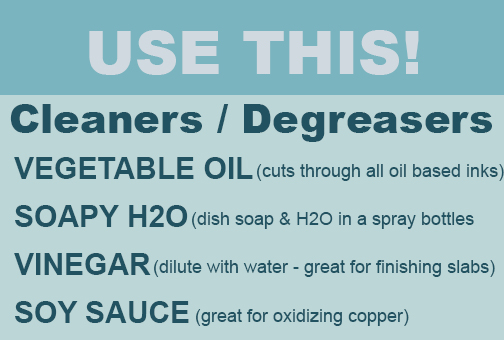
Do not use Estisol to clean ink palettes. Baby oil will dissolve ink from glass palettes. A better option is to scrape all excess ink from the glass, and wash clean with warm soapy water (dish soap). This works surprisingly well.
CREATIVE USES OF ESTISOL
Transfer medium using Estisol 242 and 150
Transfers to lithographic stone, etching plate and directly to paper
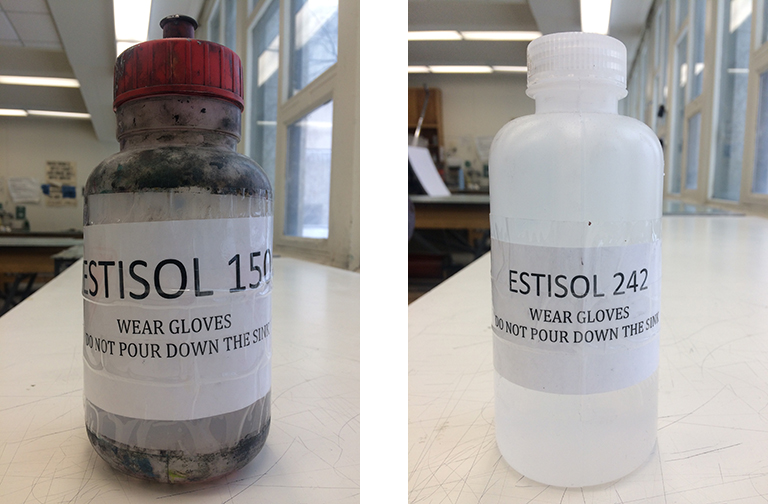
There are 2 grades of Estisol available:
Estisol 242
- General-purpose solvent, replaces varsol and lithotine
- Used for washing ink from intaglio plates, litho stones, and rollers (use sparingly on soft rollers, and do not allow it to sit on the roller long enough to absorb)
- The 242 film left after washing ink from litho stones will act as the grease base (where you would normally use asphaltum). It needs to be buffed until very thin with a dry rag.
- Use to remove etching grounds
- Will dissolve spray aquatints if fresh (same day). Rosin aquatints will require methyl hydrate, which will remain available for this purpose.
Estisol 150
- Stronger solvent
- Use where you would use lacquer thinner or acetone
- Use for photo transfers
- se for stubborn/dried ink on matrices and rollers
To get the most out of using Estisol:
- Wear gloves! Estisol is a fatty ester and will break “up” organic matter so it will try to penetrate your hands. Traditional solvents break down organic material dissolving it which is far more dangerous to human tissue and over time can break down the important fats in the brain
- Reuse rags; Estisol is non-evaporating, and non-combustible, so rags soaked in Estisol can be stored safely and reused until fully soiled
- Because Estisol does not evaporate, it will leave an oily film behind. Clean this residue with dish soap and warm water, followed by clear water. Water emulsifies the Estisol.
- Use Estisol sparingly. A little will go a long way. It does not evaporate so it stays active for a long period.
- To wash out ink or grounds from relief/intaglio plates, apply a small amount of Estisol and move it around with designated polyethylene brayers, giving it time to penetrate. Used an Estisol rag to wipe ink from the block. Wash the block with soapy water, and then rinse with clear water.
- Printers will be required to re-learn clean up techniques when using Estisol. Cleaning will take a little longer than with petroleum-based solvents.
STONE LITHOGRAPHY WASHOUT USES OF ESTISOL
Roll-up stage and Estisol:
After the litho stone and drawing have been etched, and it may be washed out with the product Estisol 242, basically an inert substance, that has no toxic or hazardess effect on the person using it, or the environment; it is biodegradable and breaks down with water and time.
You only need a small amount of Estisol to washout a stone. The edges should also be avoided. If the stone is greasy - talc can be applied around the edges to soak it up.
The roll up ink should be buffed into the stone and removed by breaking the ink with water and a sponge (paper towel can also be used). The stone will be rolled up in Senefelders Crayon Black ink, 2nd etched, and washed out again with Estisol 242, again demonstrating the health and safety procedure that eliminates toxic solvents.
Estisol can replace Asphaltum in Stone Lithography with printing inks:
- For litho printing stage, pour a small amount of 242 on the stone and use a polyethylene roller to move it around on the stone with roll-up ink. Give it some time to penetrate, prepare palettes, rollers etc. while Estisol is working.
- Use a clean dry rag to remove the ink, then buff the Estisol in very thinly with paper towels, there’s no need to apply more as a grease base! Use wet shop towels (I like the blue paper towels) to remove the gum layer and get some ink on the stone.
- Continue using towels to dampen the stone until it is inked up, then change to a sponge. Don’t use sponges too early as they’ll be contaminated with Estisol.
Washing Out Wet
- Dampen the gummed stone with a wet sponge.
- Pour a little VCA on the stone and gently rub the image drawn on the stone with a rag, adding some drops of VCA if needed. The fatty image will show darker than by cleaning with traditional solvents.
- Squeeze a wet sponge above the stone, this prevents VCA getting into the sponge. Rub the stone with a rag. The VCA will not penetrate the stone, but will float on the water, with the crayon or tusche dissolved in it. Remove water & VCA with another rag.
- Pour some gum on the stone and rub it all over with a sponge.
- The stone can be dampened and inked in the normal way now.
- Use sponges for water & gum only. rags, for VCA. Hang out your rags to dry after cleaning, the water will evaporate form it, leaving the cleaner. Both rags may be used again for the same purposes. The first will be prepared by the VCA, use it until it falls apart. The second one must be replaced regularly to keep a clean rag (In practice, rags are washed and reused regularly)
- After printing, pour some gum on the stone & distribute it evenly with a sponge. Remove excess gum with an almost dry sponge. Smooth out the later with your bare hands to prevent 'pearls'. As the VCA is fatty by itself & does not degresase the stone, no resin & talcum is needed.
Waterless Lithography
This time efficient multipurpose process uses waterless lithographic plates with silicone caulking sealant from the hardware store. This process is based on the idea that water and silicone don’t mix. In waterless lithography the non-image areas (negative spaces) are left covered with a thin layer of silicone (acting like a resist) that rejects ink. Ink will NOT stick to silicone! Ink sticks to drawn and painted areas only.
1. Plates: Use ball grained aluminum plates 12.75"x18". Round off corners of plate.
2. Silicone mixture (with Odourless Paint Thinner):
*NOTE: Can use conte sheet for transfer sketch or key drawing sketch with conte pencils will not print
Drawing on Plate:
1. When drawing image, leave adequate space on plate for margins.
2. Do not draw to edge of plate. Allow for margin borders all the way around the plate as they are required for scraper bar not to leave plate surface!!
Drawing materials:
*Water based drawing materials require heat setting for 90 seconds (otherwise drawing will become soluble in odourless paint thinner that bonds drawing materials to plate.)
- Staedtler Lumocolour water soluble pencils
- Compressed toner chalk = gives charcoal effects (w/ toner, shellac & alcohol)
- Sharpie
- Staedtler marker (permanent)
Wet + wash painting materials (flats, etc.):
*Water based drawing materials require heat setting for 90 seconds
- Photocopy toner washes = organic reticulated washes and textures
- USE DUSK MASK! Add water (or rubbing alcohol) to toner dust on dish (or jar). Brush mix to desired constancy. Add more toner dust for darkness. Toner mixed with Isopropyl alcohol yields a different type of wash = greys. Add drops of dishwashing liquid or foto flow to break surface tension if mixing in toner with liquids in dish or jar. For bubbles in textures …also add several drops of shampoo toner mix in jar. Close lid and mix.
- Foto-flo washes mix with water (95%)+ Foto flow (5%) + a few drops of dishwashing liquid to break surface tension of the water
- Molasses = solid blacks..sponged on (mixture includes mag to stiffen+glycerine)
- Floor wax + India ink (a little to tint) = solid blacks *DO NOT HEAT SET
- Gouache or Gum arabic = solid blacks and flats (*washed out with water)
- NOTE: CORRECTIONS can be made BEFORE the silicone is applied! (not after)
- Remove drawing materials with water or acetone.
- Processing the plate
1. Apply first coat of Silicone to the plate
- Silicone cures & rejects ink. Silicone is very thick. It must be diluted with odourless paint thinner. Use 4oz baby food or jam glass jar with lid for mixture. Silicone can be used over a few days and should be stored in a fridge.
- SILICONE PREP
- Add to jar a small amount of silicone (grape size that holds shape). Mix 70% odourless paint thinner to 30% silicone.
- Add solvent to mix into the proper consistency like light maple syrup.
- Stir mixture (w/ plastic knife or latte mixer)
- HEAT SET
- Heat set water-based drawing materials. *HEAT SET for 90 SECONDS from the back of the plate.
- Avoid heat setting hot spots, which can affect some drawing media such as Sharpie pens which if over-heated and will not wash out. Heat and the possibility of damaging the drawing media can also warp the plate causing registration and rolling problems during printing.
SILICONE APPLICATION
After the image is heat set, apply silicone mixture coating with small sponge over the entire plate with a small square sponge. Apply only a small amount. Do not apply silicone too thickly. Dispose sponge into closed bins!
Then lightly buff plate with large sponge wrapped with 2 layers of Kleenex. Buff down smooth so silicone is thin. (so silicone lines do not appear in printing)
Avoid streaks and fingerprints! Wear gloves! Every fingerprint or variation in silicone thickness will print. If the artwork is a bleed print, hold the plate outside the image area or where fingerprints would not show, such as areas with heavy toner washes.)
2. Curing the Silicon
- Allow the silicone to cure naturally at room temperature for 12 to 24 hours. (It is extremely important that the silicone is properly cured as it can be damaged when the toner image is washed out.)
3. APPLY SECOND COAT OF SILICON
- Apply sparingly with Kleenex. Let cure 12 or more hours.
4. Washing out the Image
- Washing out the positive image areas removes the silicone layer on top of drawing material. Silicone remains in negative areas.
- Roll up ink will then only stick to the image areas only.
- Required supplies:
- For water-based materials, wash out image carefully with sponge (or soft rag or kleenex) + water for Gum Arabic/molasses washes + pencil. At sink, remove with water (molasses, pencil marks) Blot with clean newsprint. Add mag if very loose.
- For toner and heat set image materials (toner washes, permanent marker) pour a small amount of 1. Acetone and retarder on Kleenex tissue to wash out. Use small circular motions to soften the toner to remove
- Use acetone to clean 3. Use dish soap+water to finishes cleaning
- Remove Foto flow wash with Isopropyl or Methyl alcohol
- Remove Floor wax/India link with TSP (or acetone)
WASHOUT TIPS:
- Do not attempt to completely clean that area of the plate but continue removing the greater part of the toner, especially thick areas.
- On the first attempt you will leave a thin veil of toner over the image area but this can be more carefully removed later with fresh tissue.
- It may be necessary to apply acetone to the entire non-printing area of the plate to remove the thin layer of silicone oil left on the surface.
- As soon as all of the toner is dissolved, it is quickly washed off with water and a sponge and the plate dried.
5. Rolling Out the Ink
Inking and Printing Supplies:
- *USE ONLY Van Son rubber-based inks
- will not stick to silicone.
- high viscosity, non-greasy and with high tack
- *Add magnesium to stiffen ink and give it more tack and body. Ink should not be too
- soft nor too fluid) black = mag of quarter size NOTE: yellow, red, white require more mag!
- Clean Rubber rollers and/or brayers
NOTE: The ink should be rolled out before washing out the image thereby allowing it to tighten up a little on the slab before the plate is inked. It is better not to leave a freshly washed out plate in an open state. This can cause some damage to the image especially on a plate where the silicone has not been totally cured. Small hard rollers are best for smaller plates. A lean ink film will generate better tack than a thicker slab.
Apply lean film of rubber ink on the regular glass slab with a brayer or hard roller.
PREPARATION FOR PRINTING
- Printmaking paper:
- Calendared (pre-stretched) soft papers can absorb ink under pressure & give the most accurate impressions. (BFK Rives, Arches, etc.)
On Press:
- Place Registration tape for press bed (or tabs) Mark location of plate, and registration marks for press bed
- The plexiglas tympans are easily damaged. Damaged tympan with cut lines ruin prints. When printing waterless litho plates on the press……
- ONLY use a scraper bar that is more narrow that your plate.
- DO NOT run the scraper bar over the edge of the plate. (This damages the tympan and scraper bar.)
- Use paper mask stencil over print image if drawing is to edges of plate.
INKING PLATE
- Apply ink on plate with roller on glass slab with silicone. Start your roller on the silicone glass plate off your actual printing element. It is best to roll fairly quickly across your plate diagonally, not stopping, until your roller is completely off the plate. This rolling pattern is repeated until the plate is fully inked.
- Do not stop or change direction in the middle of the plate because that will leave a tint line which may become hard to get rid of by rolling.
- If the plate is scumming badly, roll it vigorously with clean brayers to clean it up. Sometimes with just this step and some proofing, the plate will straighten up. The cause may have been that the plate was not properly washed out.
- If you plate does not take ink,
- use a very slow roll with plenty of pressure may be required at first for the ink to stick, but a fast roll will lift the tinting.
- use a small amount of acetone mixed with ink on a Kleenex to rub in areas of ink on plate
- If there is tinting along the edge of the plate, use a small diameter brayer and go over these areas quickly to remove the ink. The brayer can be rejuvenated for the next pass by rolling over an old telephone book page or other paper.
- Over-inking has to be removed with a sheet of newsprint run through the press.
- Stiff ink darkens images. Use softer ink for lighter tints & cleanest passages.
Troubleshooting Printing problems
- If you find that you have fingerprints in your silicone coating, or if, you missed applying silicone a portion of your plate. Then you must clean out the ink in those portions of your plate with a degreaser diluted with water before adding silicone to those areas. Your plate should then be left overnight for curing. Deletions you wish to make in your image area are handled the same way.
- If the plate still is scumming badly then assume that the silicone may have been applied too thinly. Clean up your plate as much as possible by rolling it with small brayers. Then add another coat of silicone leaving ink in the plate to protect your image. Do not worry if all the non-image areas cannot totally clean up as they will clean up in the process of applying fresh silicone. Adding another coat of silicone will improve the ink rejecting property of your plate If the plate does not take ink, roll slower and add a little downward pressure.
- If the plate still is not taking ink, the silicone may not have cured long enough before wash out. This would allow the silicone to travel from the non-image areas to the image areas causing the entire plate surface to reject ink.
- If small portions of the image are lost they can sometimes be replaced in another colour run or added back into the original plate by scratching away the silicone.
- Another common problem is applying the silicone unevenly, this will cause the valleys in your silicone to take ink and print. Increasing the tack of your inks with body additive (Mag) will work. Try rolling the plate in the direction of the ridges first. This will often take care of the problem without causing new ones such as developing to much tack in your inks. What happens when the Ink has too much tack is that the print will start to look under inked and your rollers will begin to push the inking slab and the sub plate around as your roll on them. If this happens Its time to add Green Drop tack reducer. It is normal for this ink to gain some tack in a run. In this situation, the solution is to scrape back the slab and put fresh ink out. I usually scrape back my slab at least once in an edition.
Plate Storage (between proofs and printing)
When printing or proofing is finished, do not wash the ink from the plate.
If ink is removed before storage, the silicone creeps into the fine image areas and prevents the reprinting of the plates. The ink protects the metal surface from oxidization and it can be easily removed later with acetone. Keep the plate in a zip lock plastic bag or other covering.
Photo Lithography
- Digital transparencies and Waterless drawing materials must be exposed with the same light units.
- If you go lower than the recommended light units, the plate tends to "fog up" and won't clean up properly. If you shoot too high, there's a loss of fine detail and the image ends up being too high contrast.
- Exposure amount can vary a bit depending on the image. If you are very particular about getting the absolutely best exposure amount for their images can cut up a photolitho plate into test strips to try out a range of exposures.
Inks & Modifiers
Videos
Photo-Lithography with Polyester Plates
(Source: The Printmakers Compendium by Tara Cooper)
Polyester Plate Lithography: Step One - Drawing Directly on Plate
Polyester Plate Lithography: Step Two - Applying Ink
Polyester Plate Lithography: Step Three - Printing
Polyester Plate Lithography: Step Four - Cleaning
Quick Tips: Plate Lithography – Cleaning Polyester Litho Plates
Using Your Computer for Image Processing (Polymer Etching)
(Source: The Printmakers Compendium by Tara Cooper)
Computer Method: Step One - Preparing Photographic Film for Polymer Etching
Computer Method: Step Two – Bitmap
Computer Method: Step Two – Contrast
Computer Method: Step One – Scanning
Cleaning Tips
Safer Printmaking Cleaning – A Word of Caution
There are several institutions in Canada including the University of Saskatchewan, Nova Scotia College of Art and Design, the Ontario College of Art and Design, Queens University, The University of Alberta, who have successfully made the cross-over to non-toxic vegetable cleaners. Representatives from other institutions who have replaced Varsol and other petroleum based cleaners with Estisol or soy-based non-toxic vegetable cleaners. There is a learning curve when making the transition from petroleum-based to vegetable-based solvents. Vegetable-based solvents can destroy rollers if not removed properly and cleaned up completely.
Estisol
Estisol is quite a celebrated remedy to Varsol. It is not, however, totally benign. Though safe for human health when you follow correct procedures (don't rub it on your skin!), it does release carbon monoxide and dioxide when it's decomposing. It is also not meant to be released into the water system (see MSDS)--so, not stellar for the environment. However, the great advantage is that such a tiny amount is needed to be effective, the damage is highly mitigated. One source also notes that pure estisol is safe for the ecosystem: it's the fact that it is usually washed down the drain with whatever substance it was used to break down (like litho ink) as well that is the problem.
Tips on Lithography with Estisol
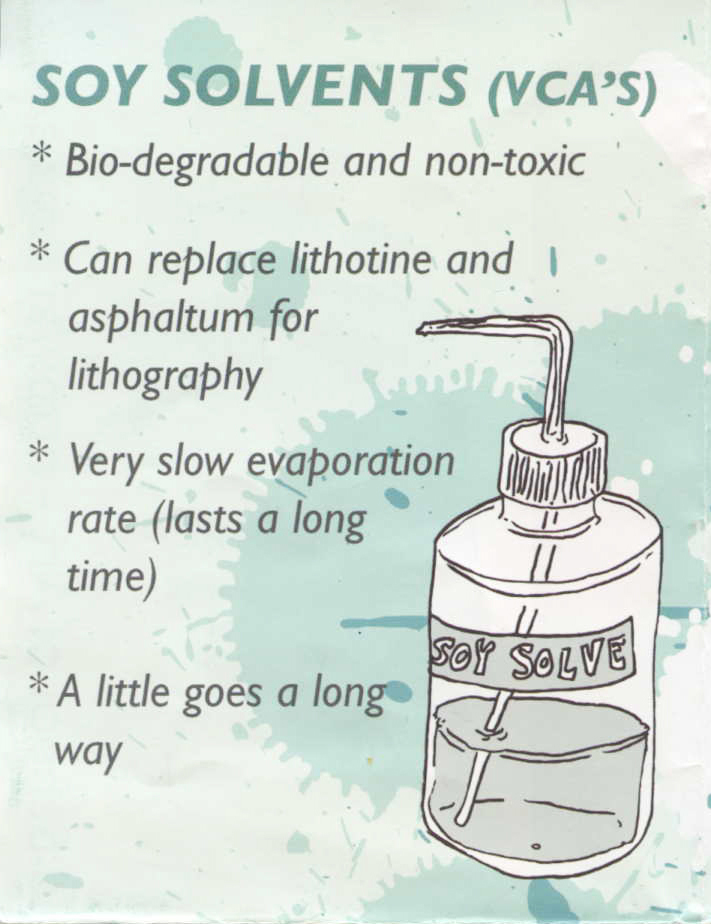
VCA (Vegetable Cleaning Agent – Estisol is a VCA) is a better one than volatile solvents as it keeps the image in the stone. This means that usually two proofs will do before the image holds enough ink. All kinds of VCA, including those containing emulsifiers, may be used. It does not affect the lithographic process; it might even be called fool-proof in cleaning stones. After the normal etching procedures have taken place, lithographic stones & plates may be washed using VCA with water (= wet) or without water (= dry).
Washing Out Wet
- Dampen the gummed stone with a wet sponge.
- Pour a little VCA on the stone & gently rub the image drawn on the stone with a rag, adding some drops of VCA if needed. The fatty image will show darker than by cleaning with traditional solvents.
- Squeeze a wet sponge above the stone, this prevents VCA getting into the sponge. Rub the stone with a rag. The VCA will not penetrate the stone, but will float on the water, with the crayon or tusche dissolved in it. Remove water + VCA with another rag.
- Pour some gum on the stone & rub it all over with a sponge.
- The stone can be dampened & inked in the normal way now.
- Use sponges for water & gum only, rags for VCA. Hang out your rags to dry after cleaning. The water will evaporate from it leaving the cleanser. Both rags may be used again for the same purposes. The first will be penetrated by the VCA, use it until it falls apart. The second one must be replaced regularly to keep a clean rag. (In practice rags are washed regularly & re-used.)
- NB: After printing pour some gum on the stone & distribute it evenly with a sponge. Remove excess gum with an almost dry sponge. Smooth out the layer with your bare hands to prevent 'pearls'. As the VCA is fatty by itself, & does not degrease the stone, no resin & talcum is needed.
Washing Out Dry
- Rub your gum well into the stone; it should not be visible on the image. The gum should be thoroughly dry.
- Rub your image with an absolutely dry rag adding VCA drop by drop. Keep this rag in a dry place where it cannot get wet.
- Let the VCA dissolve the crayon or tusche.
- Rub the stone until you are certain the image has fully dissolved. This may sometimes be difficult to see.
- Take another rag & rub the stone again, taking off the VCA with the crayon or tusche. A minimal amount of VCA will be left on the stone, but, because it does not evaporate nor dry sticking to the stone, it does not affect the lithographic process. (Possible remnants of VCA will be taken off in proofing, see below).
- Sprinkle some fresh water onto the stone & clean it with the rag, proceeding as described above. (The rag also takes off the VCA, therefore you do not use the sponge.)
- If you want to, you may ink up the stone dry. The minimal amount of VCA then left mixes on the stone with the ink & will not get onto the roller. See to it that the layer of gum stays intact, so keep it absolutely dry. After rolling-up with black ink, take a rubber roller, dampen & roll-off the stone. The mixture of ink & VCA is taken off the stone by proofing.
- Rubber rollers are cleaned with VCA & immediately afterwards washed with soap & water, leaving a totally clean roller. A leather roller may never be cleaned in this way as the VCA will penetrate deeply into the leather.
Suppliers
- Cranfield - Inks and etching supplies
- Curry's Artists' Materials - Printmaking Supplies and Equipment
- EstiChem - Estisol 242 & 150 and Lithography supplies
- Graphic Chemical - Inks for lithography, relief, intaglio, and screenprinting
- Griso-Chemie AG - Eco-friendly printmaking cleaning supplies
- Hawthorn Printmaker Supplies - Inks for lithography, relief, intaglio, and screenprinting
- Opus Art Supplies - Intaglio and Lithography Inks